Hi there! This is something I’ve been wanting to put together for a while now, as mining has become a staple of Pixel Worlds and there’s yet to be a single complete guide for it. The wiki is the closest thing we have, as well as various forum posts with scattered info. I can remember starting out and not having a clue what to do, and being unable to find much information on how to get started was tough. The goal is to put EVERYthing you’ll need to know here as you start and progress through the mines. To make this a one-stop-shop if you know what I mean. This is weeks in the making, so it should be thorough, but I will add to it as need be. And feel free to correct any mistakes I made! So without further ado, I’m LittleItaly, and this is my
Ultimate Guide To Mining
What Is Mining?
What is Mining?
The mines are currently the best way to profit (aside from trading). With the right gear and know-how, the mines can net you tens of thousand of bytes per day. I will cover the different mining levels and everything you need to know about them later in this guide, as well as gear, but for now just remember that gear and pickaxe is EVERYTHING. Without gear mining above Level 2 is essentially a waste. It affects gemstone drop rates, loot drop rates and light levels. Picking gear is tricky, but I’ll rate them all on how good their functionality and price is later in this guide. What kind of pickaxe you have affects range, break power, damage, and gemstone drop rates. Mining takes time and a little bit of skill, but I’m sure you’ll find it’s worth it.
Entering a mine costs 1 key. Different level mines require different keys. The Level 1 mine is free to enter, no key necessary. You’ll enter at the top of the world and progress downwards towards the mine exit. When exploring the mines, you’ll come across gemstone blocks, nuggets, and enemies. These are all means of profiting through the mines. Gemstone blocks drop gemstones, which you can redeem for gems or sell for bytes. Nuggets are used for crafting mine keys for the next mine level (100 for 1 key) , and you’ll get an extra 20 of that mine’s nugget when you leave through the mine exit. Enemies drop ingredients, which can be used to craft gear, upgrade your pickaxe, or be sold for bytes.
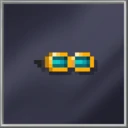
- Gemstone Block (Topaz)
- Bronze Nugget
- Mine Exit Room
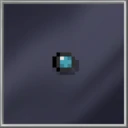
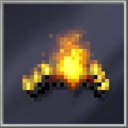
The mines are dark, and in order to see what you’re doing you’ll continuously need to restock on light crystal energy as you traverse them. These crystals are scattered all throughout the mines, and come in three different sizes.
- Small Light Crystal
- Medium Light Crystal
- Large Light Crystal
NPCs
NPCs
NPCs are nonplayable characters that hang around PIXELMINES. They have a variety of different uses, and I’ll cover them all here.

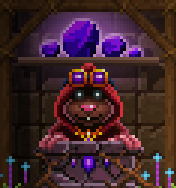
Gemstone Buyer
- Located directly left of spawn. You can sell him your gemstones for gems. Gemstone prices increase with type and size, below are the list of gemstones and their prices in gems.
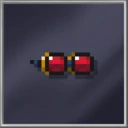
Topaz - Tiny: 3, Small: 6, Medium: 12, Large: 30, Huge: 90
Emerald - Tiny: 5, Small: 10, Medium: 20, Large: 50, Huge: 150
Sapphire - Tiny: 10, Small: 20, Medium: 40, Large: 100, Huge: 300
Ruby - Tiny: 20, Small: 40, Medium: 80, Large: 100, Huge: 600
Diamond - Tiny: 30, Small: 60, Medium: 120, Large: 300, Huge: 900

Mining Gear NPC
- Located directly left and down from spawn. Bring him the necessary ingredients, gemstones, and gems, and he’ll help you craft a variety of different gear, as well as the starter pickaxe and repair kits. As I said, I’ll cover gear and pickaxes more thoroughly later in the guide. So for convenience sake I’ll only include the Pickaxe Repair Kit recipe here.
Pickaxe Repair Kit - Repairs your pickaxe. (5 Rusty Nail + 5 Old Miner’s Shoe)

Pickaxe Upgrade Station
- Located right and down from spawn. Bring him the necessary ingredients, gemstones, and gems, and he’ll help you upgrade your pickaxes. Again, since I’ll be covering them thoroughly later I won’t include their recipes here.
Dark Stone Vendor
- Located to the far right of spawn. Will trade rare items for dark stones. I’ll list what he offers and their prices below.
Golden Mining Helmet - 20 Dark Stones
Mechanical Crossbow - 35 Dark Stones
Dark Carbon Fiber Rod - 100 Dark Stones
Swift Slicer - 175 Dark Stones
Dark Pickaxe - 250 Dark Stones
Wings Of The Deep - 750 Dark Stones

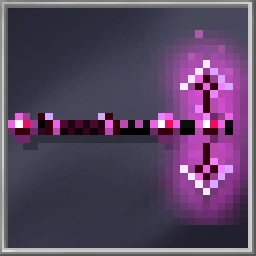
Wheel Of Fortune Scamming
-
A
fortunousscamming wheel. Located to the left and down of spawn, below the Gemstone Buyer. Level 2 - 5 mines grant a Mining Coin upon leaving through the mine exit. They look like this:

Each spin costs 1 Mining Coin and can reward with 5 prize tiers. Those being 1 star, 2 stars, 3 stars, 4 stars, and 5 stars. -
Note: you will never get the 5 star prize. I don’t know who the heck is winning these things.
Enemies
Enemies
There are 4 different types of enemies in the mines. Memorize their patterns and they just become a means to get loot. You’ll need to know how to handle them if you want to grind Level 5 mines, as they’re abundant and the source of pocket watches (the best loot you can get).
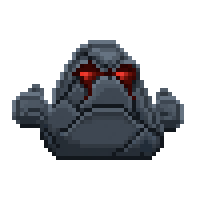
Rocky Horror
- This enemy does not move, but will summon 3 spikes to come out of the ground on and around you. Also capable of summoning spikes through walls. This is signaled by red markings on the tiles the spikes will appear from. Not very hard to kill but the spikes can be a pain if they catch you by surprise. These are best dealt with by avoiding the spikes for the first attack and attacking back while the enemy is in cooldown.
Health - 250
Damage - 55 (25 earth)
Spike Damage - 100 (earth)
Resistance - 100 (earth)
EXP - 50

Giant Bat
- Can appear anywhere on the screen, and will immediately start flying towards you at a quick speed. This enemy can fly through all blocks and in all directions. Generally pretty easy to kill but can be a hassle when multiple spawn at once. Easily dealt with by moving in the opposite direction as the enemy while attacking it. In groups of bats, flee and pick them off as they get close.
Health - 150
Damage - 85
Resistance - 50 (earth)
EXP - 30
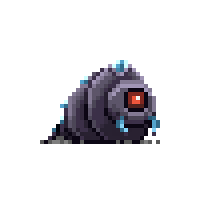
Deep Maggot
- Appears randomly on nearby empty spaces with a solid block beneath it. Will charge a projectile and shoot it in the direction the player was standing when it started charging the attack. Projectiles can move through all blocks, and can be shot in all directions. After taking a shot, this enemy will burrow into the ground and reappear in another place. They are best dealt with as soon as they spawn as their projectiles can trap you into bad situations when multiple other enemies appear alongside or after them. Attack during their shot cooldown or as soon as they appear if close enough.
Health - 150
Damage - 55
Projectile Damage - 150
Resistance - 50 (earth)

Gassy
- This enemy, like giant bats, can appear anywhere on the screen (typically close to the player) and move through all blocks. These enemies deal no damage on contact, rather they self destruct in an explosion of gas that will hurt the player if they’re on top of or next to the enemy. These explosions deal heavy damage and will slow the player and reduce jump height greatly for a time. These enemies have two attack patterns. The first and most common attack is to immediately fly towards where the player is standing at a very high speed, then explode after a brief charge-up. The second and less common attack is for the enemy to appear and not fly towards you, but self destruct exactly where they spawned. These enemies do not drop loot and the best way to handle them is to just get out of the way. Remember, they don’t deal contact damage so running through them is perfectly fine. DO NOT expect the second attack. Always treat the appearance of a Gassy like the first attack until you’re sure it’s not.
Health - 0
Damage - 0
Explosion Damage Formula - (30 - Player’s Earth Elemental Resistance) x 500%)
Resistance - 0
Ingredients
Ingredients
Ingredients, a.k.a. drops, a.k.a. loot, can drop when you kill an enemy. They’re used for crafting gear and upgrading pickaxes, and pocket watches sell for thousands of bytes. It’s good to recognize what ingredients drop from what level mines and plan your expeditions accordingly. I’ll list them below and what mine(s) they can be found in.
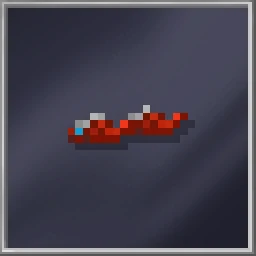
Old Miner’s Shoe - Can be found in level 1 (common drop)
Rusty Nail - Can be found in levels 1-2, (common drop)
Piece Of Rope - Can be found in levels 2-3 (uncommon drop)
Tin Can - Can be found in levels 2-4 (uncommon drop)
Miner’s Bucket - Can be found in levels 3-5 (rare drop)
Matchbox - Can be found in levels 2-5 (rare drop)
Gold Tooth - Can be found in levels 4-5 (ultra rare drop)
Silver Coin - Can be found in level 5 (ultra rare drop)
Pocket Watch - Can be found in level 5. The holy grail of loot (legendary drop)
Pickaxes
Pickaxes
Pickaxes determine range, break power, damage, and gemstone drop rates. It is the most important aspect to mining. Each pickaxe has a specific durability, and once it runs out you will need a Pickaxe Repair Kit to restore it. These are generally inexpensive to buy and make and it’s always good to have a few handy in case your pickaxe runs out mid-mine. Aside from the dark pickaxe and classic pickaxe, every pickaxe can be upgraded up from crappy using ingredients. So you could upgrade all the way up to epic and never spend a single byte.
Ranked from best to worst
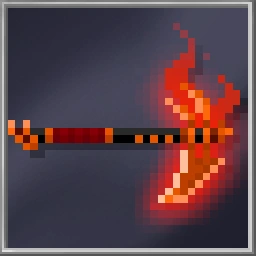
Dark Pickaxe
- The best pickaxe in the game, technically. That being said, I do not reccomend using this pickaxe unless you have plenty of bytes to spend. It is not much better than the epic pickaxe and exponentially more expensive, and only with good gear. The only difference between the two is that dark pickaxe can make gemstones drop 1-12, while an epic pickaxe drops 4-8. You will spend lots of time trying to earn back what you bought it for. More of a miner flex item.
Gemstone drops - 1-12
Range - 3
Damage - 120
Durability - 10,000
Mine speed - Super fast
This item can only be bought from the Dark Stone Vendor for 250 Dark Stones, or through trading.
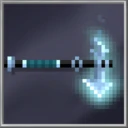
Epic Pickaxe
- Truly epick. Ha. This is the best pickaxe to use if you don’t have loads of bytes to blow on a dark pickaxe. It is exactly the same as the dark pickaxe but the gemstone drop rate is 4-8 instead of 1-12. After RNG, the gemstone drop rate is only slightly less than the dark pickaxe. Plus you get an achievement for upgrading it from a master pickaxe.
Gemstone drops - 4-8
Range - 3
Damage - 120
Durability - 10,000
Mine speed - Super fast
Recipe - Master pickaxe + 20 gold teeth
+ 5 pocket watches
+ 20 diamonds (huge)
+ 45,000 gems
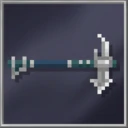
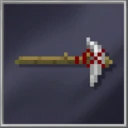
Master Pickaxe
- Proof that masters aren’t epic. The third best pickaxe in the game. Proficient up to level 4 mines but you’ll definitely want an epic pickaxe for level 5.
Gemstone drops - 3-7
Range -
Damage - 115
Durability - 8,000
Mine speed - Very Fast
Recipe - Heavy Pickaxe + 35 miner’s buckets
+ 2 pocket watches
Heavy Pickaxe
- For when you need a heavy hitter but not for your wallet. Fourth best pickaxe around. Good for mines level 1-3 and usable for level 4, but not really recommended. Definitely keep it out of level 5.
Gemstone drops - 2-5
Range -
Damage - 115
Durability - 7,000
Mine speed - Fast
Recipe - Sturdy pickaxe + 30 matchboxes
+ 10 silver coins
+ 5 rubies (huge)
+ 20,000 gems
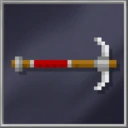
Sturdy Pickaxe
- Sturdy over turdy. Not the best pickaxe, but good enough. Comes in at 5th best pickaxe. Useful for mines level 1-2 and acceptable for level 3, but not good for anything higher than that.
Gemstone drops - 2-4
Range -
Damage - 110
Durability - 6,500
Mine speed - Normal
Recipe - Basic pickaxe + 50 rusty nails
+ 25 miner’s buckets
+ 12,000 gems
Classic Pickaxe
- A basic pickaxe with better mine speed. That’s it. Truly classic.
Gemstone drops - 1-3
Range -
Damage - 110
Durability - 6,000
Mine speed - Normal
This item can only be obtained from the Epic Miner achievement or through trading.
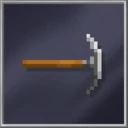
Basic Pickaxe
- The girlfriend your parents don’t want you to bring home, except a pickaxe. Nothing special to say about it. Really only good for level 1 and 2 mines.
Gemstone drops - 1-3
Range -
Damage - 110
Durability - 6,000
Mine speed - Kinda slow
Recipe - Flimsy pickaxe + 25 tin cans
+ 5 silver coins
+ 7,500 gems

Flimsy Pickaxe
- Not a very good pickaxe. But you work with what you got. At least it’s not the worst. Good for level 1 and alright for level 2.
Gemstone drops - 1-2
Range -
Damage - 105
Durability - 5,500
Mine speed - Slow
Recipe - Crappy pickaxe + 25 old miner’s shoes
+ 10 pieces of rope
+ 3 topaz (huge)
+ 5,000 gems
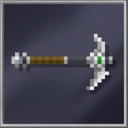
Crappy Pickaxe
- A fitting name. This thing stinks. Literally a rock tied to a stick. The very first pickaxe, obtainable from the Mining Gear NPC for 2,000 gems.
Gemstone drops - 1
Range -
Damage - 100
Durability - 5,000
Mine speed - Very slow
This item is only obtainable from the Mining Gear NPC for 2,000 gems or through trading.
Gear
Gear
Gear is very, very important when mining. It affects gemstone drop rates, loot drop rates and light levels. The best gear set applies for all mines, but certain gear can be good alternatives in certain levels, and I’ll mention those when it’s necessary.
Ranked by clothing type, from best to worst in each category.
Shoes
Shoes
 (RECCOMENDED)
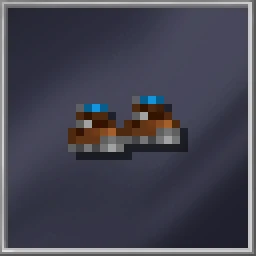
Deep Dweller Shoes - Adds enemy indicator. Same function as Excavator boots but cheaper to make or buy. Better to get mouse tail and use the shoes spot for something with better armor.
Recipe - 75 old miner’s shoes ![]() + 2 matchboxes
+ 2 matchboxes ![]() + 20 topaz (large)
+ 20 topaz (large) ![]() + 10,000 gems
+ 10,000 gems
Excavator Boots - Adds enemy indicator. Same function as Deep Dweller shoes but more expensive to make or buy. Better to get mouse tail and use the shoes spot for something with better armor.
Recipe - 125 old miner’s shoes ![]() + 2 miner’s buckets
+ 2 miner’s buckets ![]() + 40 topaz (large)
+ 40 topaz (large) ![]() + 10,000 gems
+ 10,000 gems
Pants
Pants
 (RECOMMENDED)
Deep Dweller Pants - The best and only mining pants. Increases the efficiency of light crystals.
Recipe - 50 pieces of rope ![]() + 10 matchboxes
+ 10 matchboxes ![]() + 5 topaz (huge)
+ 5 topaz (huge) ![]() + 50,000 gems
+ 50,000 gems
Gloves
Gloves
 (RECOMMENDED)
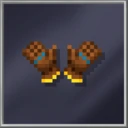
Excavator Gloves - Again, the best and only gloves for mining. Increases the chance of finding huge gemstones.
Recipe - 75 rusty nails ![]() + 4 gold teeth
+ 4 gold teeth ![]() + 10 topaz (huge)
+ 10 topaz (huge) ![]() + 10,000 gems
+ 10,000 gems
Shirts
Shirts
 (RECOMMENDED)
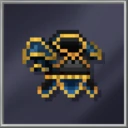
Deep Dweller Shirt - Best mining shirt because the devs added armor to this one. Much cheaper than excavator shirt. Increases ingredient drops.
Recipe - 60 pieces of rope ![]() + 40 tin cans
+ 40 tin cans ![]() + 30 emeralds (large)
+ 30 emeralds (large) ![]() + 25,000 gems
+ 25,000 gems
Excavator Shirt - Same function as deep dweller shirt but significantly more expensive, and the devs forgot to add armor to it lol. People only wear this to flex. Increases ingredient drops.
Recipe - 30 matchboxes ![]() + 1 pocket watch
+ 1 pocket watch ![]() + 60 emeralds (large)
+ 60 emeralds (large) ![]() + 30,000 gems
+ 30,000 gems
Neck/Back Items
Neck/Back Items
 (RECOMMENDED FOR LEVEL 5)
Miner Backpack - Best back item for mining for level 5 mines. Increases ingredient drop chance.
Recipe - 200 old miner’s shoes ![]() + 40 miner’s buckets
+ 40 miner’s buckets ![]() + 100 rubies (large)
+ 100 rubies (large) ![]() + 25,000 gems
+ 25,000 gems
 (RECCOMENDED FOR LEVELS 1-4)
Pendant Of The Moment - The best neck item for mines level 1-4, and since it’s not neck and back like miner backpack, it can accommodate a back item like wings or a jetpack. Same function as pendant of brightness but cheaper to make or buy. Increases ambient light.
Recipe - 300 tin cans ![]() + 15 silver coins
+ 15 silver coins ![]() + 15 rubies (huge)
+ 15 rubies (huge) ![]() + 10,000 gems
+ 10,000 gems

Pendant Of Brightness - Same function as pendant of the moment but more expensive to make or buy. Also an okay alternative to miner backpack in level 1-4 mines. Increases ambient light.
Recipe - 30 gold teeth ![]() + 20 silver coins
+ 20 silver coins ![]() + 10 rubies (huge)
+ 10 rubies (huge) ![]() + 20,000 gems
+ 20,000 gems
Lower Face Items
Lower Face Items
 (RECOMMENDED)
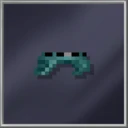
Miner Gasmask - Best lower face item for mining, plus it looks pretty cool. Increases the chance of finding huge gemstones.
Recipe - 50 matchboxes ![]() + 5 pocket watches
+ 5 pocket watches ![]() + 200 rubies (large)
+ 200 rubies (large) ![]() + 50,000 gems
+ 50,000 gems

Excavator Mustache - Same function as deep dweller beard and ever so slightly less expensive to make or buy. Increases the chance for extra gemstones.
Recipe - 20 matchboxes ![]() + 10 gold teeth
+ 10 gold teeth ![]() + 40 sapphires (large)
+ 40 sapphires (large) ![]() + 40,000 gems
+ 40,000 gems

Deep Dweller Beard - Same function as excavator mustache and ever so slightly more expensive to make or buy. Increases the chance for extra gemstones.
Recipe - 150 rusty nails ![]() + 7 silver coins
+ 7 silver coins ![]() + 10 emeralds (huge)
+ 10 emeralds (huge) ![]() + 50,000 gems
+ 50,000 gems
Glasses
Glasses
 (RECOMMENDED)
Excavator Glasses - Same function and price as deep dweller glasses, but since I think they look cooler they come first. Slightly more expensive to craft. Increases the chance of finding huge gemstones.
Recipe - 75 pieces of rope ![]() + 4 pocket watches
+ 4 pocket watches ![]() + 20 sapphires (huge)
+ 20 sapphires (huge) ![]() + 30,000 gems
+ 30,000 gems
Deep Dweller Glasses - Same function as deep dweller glasses and virtually the same price. Slightly cheaper to craft. Increases the chance of finding huge gemstones.
Recipe - 150 rusty nails ![]() + 4 pocket watches
+ 4 pocket watches ![]() + 200 sapphires (large)
+ 200 sapphires (large) ![]() + 20,000 gems
+ 20,000 gems
Monocle Of Seeing - By far the worst glasses to use for mining. Increases light range when light crystal energy is depleted. Maybe this sounds nice, but are more than enough light crystals in the mines to keep your light crystal energy gauge from dropping to 0. And even if it does it’s usually never for long. This item is essentially useless. And expensive.
Recipe - 20 miner’s buckets ![]() + 20 silver coins
+ 20 silver coins ![]() + 15 sapphires (huge)
+ 15 sapphires (huge) ![]() + 50,000 gems
+ 50,000 gems
Head Items
Head Items
 (RECOMMENDED)
Sturdy Mining Helmet - Same function as golden mining helmet, crown of flames, and headband lamp, but is the cheapest option. Increases the chance for extra gemstones.
Recipe - 175 pieces of rope ![]() + 30 gold teeth
+ 30 gold teeth ![]() + 10 diamonds (huge)
+ 10 diamonds (huge) ![]() + 50,000 gems
+ 50,000 gems
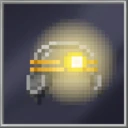
Golden Mining Helmet - Same function as sturdy mining helmet, crown of flames, and headband lamp but significantly cheaper than the last two. Increases the chance for extra gemstones.
This item can only be obtained from the Dark Stone Vendor for 20 Dark Stones or through trading
Crown Of Flames - Same function as sturdy mining helmet, golden mining helmet, and headband lamp. Much more expensive than the first two but a bit cheaper than a headband lamp. Another miner flex item, plus it’s an ingredient for the space warrior jet.
Recipe - 10 matchboxes ![]() + 1 elixir of flame
+ 1 elixir of flame ![]() + 1 reinforced bamboo rod
+ 1 reinforced bamboo rod ![]() + 50,000 gems
+ 50,000 gems

Headband Lamp - Same function as sturdy mining helmet, golden mining helmet, and crown of flames, but is the most expensive option to make or buy. It’s also the worst looking of the 4 in my opinion.
Recipe - 50 matchboxes ![]() + 7 pocket watches
+ 7 pocket watches ![]() + 200 diamonds (large)
+ 200 diamonds (large) ![]() + 5,000 gems
+ 5,000 gems

Deep Dweller Hat - Same function as excavator helmet but a bit more expensive to buy and a bit less expensive to make. Not a bad buff but nothing compared to bonus gemstones, plus it’s more expensive than any of the previous 4 items. Increases light radius.
Recipe - 60 miner’s buckets ![]() + 8 pocket watches
+ 8 pocket watches ![]() + 40 diamonds (huge)
+ 40 diamonds (huge) ![]() + 40,000 gems
+ 40,000 gems

Excavator Helmet - Same function as deep dweller hat but a bit cheaper to buy and a bit more expensive to make. Increases light radius.
Recipe - 20 silver coins ![]() + 10 pocket watches
+ 10 pocket watches ![]() + 60 diamonds (huge)
+ 60 diamonds (huge) ![]() + 10,000 gems
+ 10,000 gems

Mouse Ears - The worst head item for mining. Increases light crystal efficiency (a.k.a. they fill your light crystal energy gauge more). Not really necessary since the current efficiency works just fine. Not worth sacrificing the clothing slot.
Recipe - 10 gold teeth ![]() + 7 pocket watches
+ 7 pocket watches ![]() + 150 diamonds (large)
+ 150 diamonds (large) ![]() + 10,000 gems
+ 10,000 gems
Tail
Tail

Mouse Tail - The only mining tail. Better than deep dweller shoes, as they free up a shoe slot for armor.
Recipe - 40 miner’s buckets ![]() + 5 silver coins
+ 5 silver coins ![]() + 10 emeralds (huge)
+ 10 emeralds (huge) ![]() + 40,000 gems
+ 40,000 gems


